I was trying to write a project report at 1:30 a.m. when my upstairs neighbor started what sounded like competitive furniture dragging. That was the exact moment I realized: student housing is basically a live experiment in acoustics, whether we like it or not.
If you want the quick version: you can fix a surprising amount of neighbor noise with smart layers on your floor, thicker or decoupled surfaces on your walls, and a few cheap tricks that redirect, absorb, or block sound. The big idea is simple: treat your room like audio equipment. Control what comes in, what reflects, and what gets absorbed, and you stop feeling like you live inside someone else’s Spotify queue.
Understanding What Noise You Are Actually Fighting
I used to think “noise is noise”. Then during an engineering lecture on waves, I realized we are stuck in this constant mix of different types of sound, and each one needs a different strategy.
- Airborne noise: Talking, music, TV, people laughing, general chaos. It travels through the air and leaks through thin walls, gaps, and vents.
- Impact noise: Footsteps, chairs scraping, things dropping, doors slamming. It travels through the structure: floor, walls, ceiling.
- Low-frequency noise: Bass from speakers, subwoofers, traffic rumble. It loves to pass through walls and floors because those frequencies are long and stubborn.
If you do not know what type of noise you are dealing with, you will waste money on the wrong fix.
So before buying anything, do a simple “listen audit.” Sit in silence for 10 minutes and write down:
– Where does the noise seem to come from? Above, below, side walls, window, corridor?
– What time does it usually happen?
– Is it sharper (like footsteps) or more constant (like voices or music)?
You are basically mapping the weak points of your room.
Floor Hacks: Turning Your Floor Into a Sound Shield
I used to think floors were just “where the furniture goes.” Then I realized they are also giant sound highways.
1. Layered Rugs: The Student-Friendly MVP
This is the classic student move, but the details matter a lot more than the aesthetics.
A thin single rug does almost nothing; multiple dense layers start acting like a real sound barrier.
Strategy that actually works:
- Base layer: Cheap rug pad or yoga mat sheets. These add a bit of separation between impact and the actual hard floor.
- Middle layer: Old blanket, moving blanket, or folded duvet. This is the dense, soft layer that eats some of the energy.
- Top layer: Thicker rug that makes it look intentional, not like a fort of panic.
If you have noisy downstairs neighbors, this will help a little, but it shines more at:
– Reducing how loud your own footsteps or chair movement sound to them.
– Damping reflected sound in your room, so your space feels calmer.
| Floor setup | What it helps with | Rough effort level |
|---|---|---|
| Bare floor | Nothing, sound reflects and travels freely | 0/10 |
| Single thin rug | Minor echo reduction | 2/10 |
| Rug + pad | Better impact noise control, less echo | 4/10 |
| Rug + pad + blanket layer | Best DIY control without construction | 6/10 |
2. “Fake Carpet” for Hard Floors
If you have tile, concrete, or wood, you can build a pseudo-carpet system that feels almost like a soft floor without permanent installation.
What to use:
- Interlocking foam tiles (the kind used in gyms or kids rooms).
- Dense rubber gym mats under high-impact zones (desk chair, bed edge, door area).
- Rug on top so it does not look like a kindergarten.
This helps a lot with:
– Chair wheels.
– Dropped items.
– Footsteps when you walk around at night.
It does not block your neighbor’s music, but it reduces structure-borne noise leaving your room and makes your own space less echoey.
3. Furniture As Floor Buffers
I realized one night that my loudest noise was not my neighbor. It was my own chair scraping across the floor every time I moved.
Easy fixes:
- Felt pads or rubber feet on every chair, table, and bed leg.
- Desk chair mat: not just for rolling, but also to stop the chair from making that grinding sound on hard floor.
- Soft “landing zones”: a small rug or mat where you drop your backpack or gym bag.
Treat every object that regularly hits the floor as a mini sound source and pad it.
4. For Upstairs Noise: Targeted Ceiling Support
You probably cannot touch the actual ceiling in student housing. But you can hack the space right under it.
Tricks that connect floor and ceiling strategies:
- Tall shelves or wardrobes pushed up near the ceiling along shared-wall sides. They add mass and interrupt sound paths.
- Ceiling “clouds”: light acoustic panels or even thick blankets hung on hooks and fishing line a few centimeters below the ceiling above your bed or desk.
Is it pretty? Not always. Does it make 2 a.m. footstep storms slightly more tolerable? Yes.
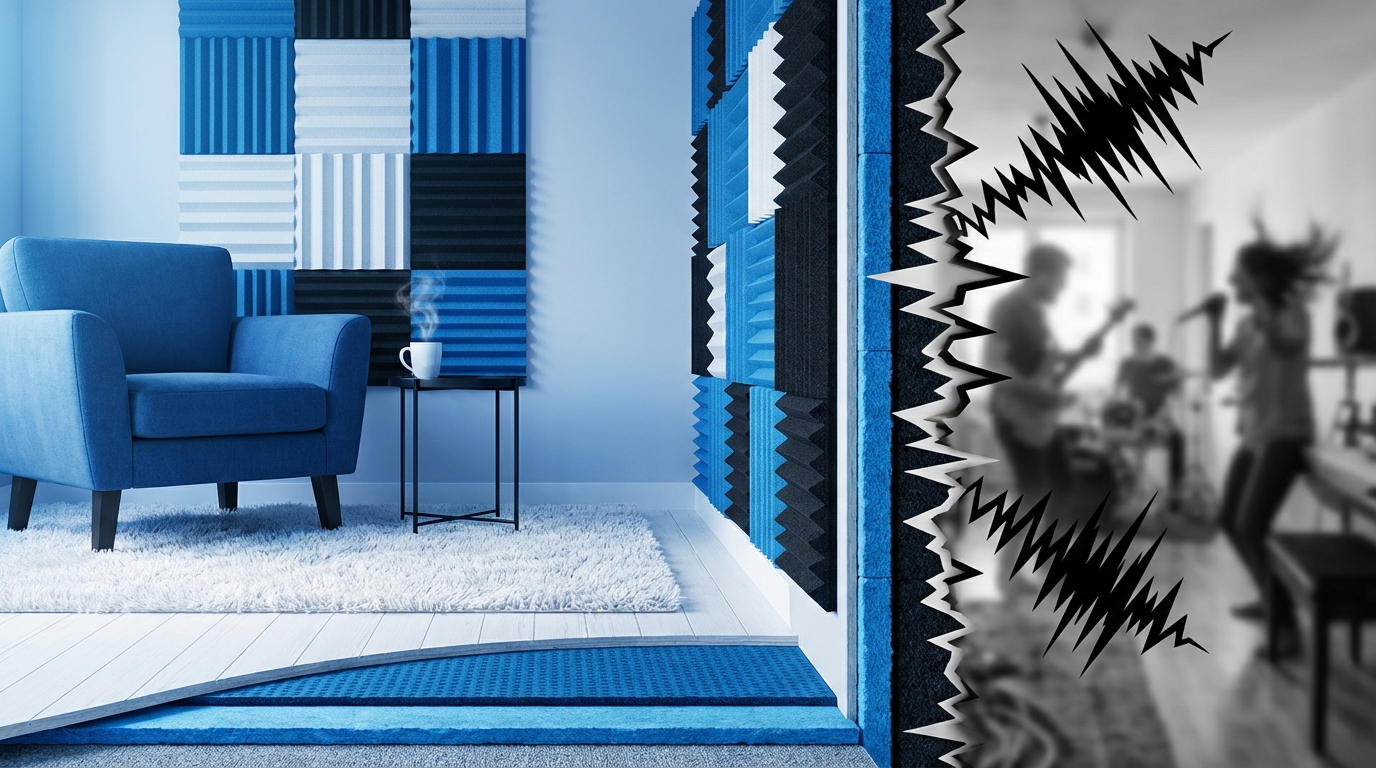
Wall Hacks: Your Vertical Sound Battlefield
Walls feel solid, but from a sound perspective, a lot of student walls might as well be cardboard.
5. Find the Real Weak Spots First
Before covering every surface, test what actually leaks.
Simple tests:
- Press your ear against different spots along the wall when neighbors are loud. You will notice “hot zones” where sound is much clearer.
- Check around outlets, vents, door frames, window frames. These gaps are like little megaphones.
Sound loves gaps more than it loves thin surfaces.
If your housing rules allow it, use:
– Removable caulk or weatherstripping around frames.
– Foam gaskets behind outlet covers (cheap and invisible).
If you cannot change anything, you can still cover those spots with:
– A bookshelf.
– A thick wall hanging.
– A stack of pillows or foam behind furniture.
6. Bookshelves: The Student-Grade Sound Barrier
This is my favorite trick because it looks like you are just very academic.
To turn a bookshelf into a sound buffer:
- Place it directly against the shared wall with your neighbor.
- Fill it with dense, irregular stuff: books, binders, storage boxes, not just air.
- Avoid massive gaps behind it. If there is a gap, fill with blankets, foam, or folded clothes you rarely use.
Why it works:
– More mass = harder for sound to vibrate.
– Irregular surfaces scatter sound rather than passing it through cleanly.
You are basically building a mini “wall in front of a wall.”
7. Soft Wall Panels (That Do Not Look Like a Studio)
When someone says “acoustic panels”, most people imagine a music studio. For a dorm, you can do a softer, more subtle version.
Options:
- Fabric-wrapped panels: Cheap wooden frames, filled with rockwool or dense insulation, covered in fabric. Hang them like art.
- Pre-made acoustic tiles: Foam or polyester tiles that stick on. They are better at echo control than blocking heavy bass, but they help a lot for voices.
- DIY quilt panels: Old quilts or blankets framed and mounted on the shared wall.
These panels will not totally stop your neighbor’s party, but they can turn clear words into muffled noise, which is a huge mental difference.
Table for honesty:
| Panel type | Best at | Limits |
|---|---|---|
| Foam tiles | Reducing echo, softening mid/high voice tones | Weak against deep bass and structural noise |
| Rockwool/fabric panels | Stronger absorption, better for voices and mid frequencies | Need careful mounting, can shed fibers before sealed |
| Heavy blankets | Quick, cheap absorption and mild blocking | Less durable, not as strong as real panels |
8. “Decoupling” Without Construction
In class they talk about decoupling as separating surfaces so they do not transmit vibration directly. That sounds very construction-heavy, but there is a lighter version you can do.
Goal: create a layer that does not rigidly connect to the wall.
Student-tier version:
- Mount light wooden slats or a grid using removable adhesive strips.
- Attach soft panels, blankets, or quilts to the slats, not directly to the wall.
- Leave a small air gap between the fabric layer and the actual wall.
The air gap and the soft material work together:
– The air gap acts like a small buffer zone.
– The soft material absorbs some of the sound before it hits the hard wall again.
It is not magic, but it is noticeably better than fabric slapped directly on the wall.
Windows, Doors, and Weird Little Gaps
I only realized how much noise came through my door when someone talked in the hallway and it sounded like they were in my room.
9. Door Fixes that Do Not Annoy Your RA
Typical student room doors:
– Have a gap at the bottom.
– Have thin cores.
– Sit in frames with air leaks.
You can patch a lot of that without screws.
Ideas:
- Door sweep or draft stopper at the bottom. This stops both sound and actual drafts.
- Weatherstripping tape around the frame edges where light leaks through.
- Hanging textile on the inside of the door, like a thick curtain or quilt mounted on hooks.
If the hallway sounds loud, your brain never fully relaxes, even if your neighbors are quiet.
By padding the door, you shrink the “acoustic window” into your room.
10. Window Strategies: For Traffic, Parties, and Street Noise
Windows are like big holes in your sound defenses.
You probably cannot replace them. But you can:
- Use heavy curtains that go floor-to-ceiling and wall-to-wall around the window. Think blackout curtains plus maybe an extra layer behind them.
- Press foam weatherstrip into any obvious gaps where the frame does not close tightly.
- For serious noise, build a removable interior window plug: a panel of foam or insulation in a light wooden frame, pressed into the window opening.
Is an interior plug annoying to remove when you want sunlight? Yes. Will it make a loud street feel more like a far-off hum when you need to sleep before an exam? Also yes.
Cheap Acoustic Psychology: Changing How Your Brain Hears Noise
At some point, you hit physical limits. That is when I started looking at the “brain side” of sound.
11. Masking Noise: Not Just Random White Noise
White noise apps are common, but you can be strategic.
Options that work in shared housing:
- Broadband noise: white, pink, or brown noise from a fan or app. Great for covering voices.
- Nature sounds: rain, river, or quiet ambient soundscapes. Less tiring for long study sessions.
- Low background music: instrumental only, no lyrics, so your brain does not latch onto words.
Masking does not remove the noise, but it reduces the contrast, which is what keeps breaking your focus.
Think of it like backlighting on your screen: it smooths out the harsh edges.
12. Sound Zones Inside Your Room
If your room is small, this sounds strange, but you can still build “quieter” spots.
Tricks:
- Move your bed to the wall that shares the least noise, even if it looks less aesthetic.
- Place your desk so your back is to the noisiest wall. Your body acts as an extra layer between you and the sound.
- Build a micro-nook with a tall bookshelf, a floor lamp, and a chair, away from the loudest direction.
Think like: “Where can I hide from the worst of the sound inside this box?”
Being Realistic: What Students Can and Cannot Fix
This is the part where I have to be honest and maybe annoyingly practical.
13. What Soundproofing Hacks Can Actually Achieve
With the tricks above, you can usually get:
- A noticeable drop in mid and high frequency noise (voices, clinking, light music).
- Less echo inside your room, so it feels calmer and less “tinny”.
- Better sleep and focus because your brain has fewer sharp interruptions.
You will not get:
– A studio-level silent box.
– Perfect blocking of deep bass from subwoofers or constant heavy footsteps.
Table of realistic expectations:
| Noise type | How much DIY helps | Main tactics |
|---|---|---|
| Conversation through walls | Moderate to strong improvement | Wall panels, bookshelves, sealing gaps |
| Footsteps from above | Mild to moderate improvement | Ceiling “clouds”, tall furniture, earplugs at night |
| Bass-heavy music | Limited improvement | Mass where possible, masking noise, negotiation |
| Hallway chatter | Strong improvement | Door sweep, weatherstripping, hanging textile on door |
14. When the Real Fix Is a Conversation
If your neighbor plays music at 3 a.m. every day, no amount of foam squares will totally save you.
Strategy that usually works better than passive-aggressive notes:
- Pick timing: Talk during the day when they are relaxed, not right after an incident.
- Share impact, not accusations: “I have morning labs and the bass keeps waking me up” works better than “You are always loud.”
- Be specific: “Could you keep it lower after midnight?” is much clearer than “Can you be quieter?”
Hardware fixes and social fixes work best together, not in isolation.
If the building has clear quiet hours, you also have backup if talking does not work.
Putting It All Together: A Few Sample Setups
At some point I started treating rooms like mini design problems. Different constraints, different builds.
Scenario 1: Thin Walls, Loud Conversations
Symptoms:
– You hear your neighbor’s phone calls word for word.
– Even normal volume speech travels across.
Priority: wall mass + absorption.
Sample setup:
- Line the shared wall with a full bookshelf or two, filled densely.
- Hang 2 to 4 fabric-wrapped panels or quilts in the gaps above or beside them.
- Seal door gaps so hallway reverb does not add to the problem.
- Use fan or low-level pink noise during study sessions.
Scenario 2: Noisy Hallway, Slamming Doors
Symptoms:
– Every door closing in the corridor echoes into your skull.
– Random corridor conversations feel like pop-up podcasts.
Priority: door sealing + masking.
Sample setup:
- Install a door sweep or thick draft stopper.
- Add weatherstrip tape where light leaks around the sides.
- Hang a thick blanket, quilt, or curtain on the inside of the door.
- Use a small speaker or sound machine near the door as a local noise mask.
Scenario 3: Upstairs Stampede and Furniture Dragging
Symptoms:
– Heavy footfalls, occasional items dropping, chairs scraping.
– Feels like the ceiling is part of their floor.
Priority: decoupling zones + ceiling area treatment.
Sample setup:
- Position tall bookshelves and wardrobes along the wall where the sound feels strongest.
- Create a ceiling “soft zone” above your bed or desk and hang light panels or blankets slightly below the ceiling.
- Use rugs and soft furniture to stop sound bouncing inside your room.
- Negotiate directly with upstairs neighbor about chair pads and rugs on their side.
Scenario 4: Street Noise, Parties Outside, Traffic
Symptoms:
– Constant background noise from outside.
– Weekend nights spike with music and shouting.
Priority: window control + aggressive masking.
Sample setup:
- Double-layer curtains: one blackout set close to the window, one heavier decorative set outside that.
- Seal obvious frame gaps with temporary weatherstrip.
- Build a removable window plug for exams or heavy work weeks.
- Use sound masking for sleep: rain sounds, fan, or brown noise.
Budget, Time, and Sanity: Choosing What To Do First
During one late library night, I realized that soundproofing is like studying: if you try to fix everything at once, you will fail at most of it.
Fast Wins vs Deeper Projects
Quick actions you can do in a day:
- Add door sweep and weatherstripping.
- Throw down extra rugs or pads on main walkways.
- Rearrange furniture so shelves are on shared walls.
- Set up a masking noise routine.
Medium projects for a weekend:
- Build or hang fabric-wrapped panels.
- Create a decoupled blanket wall with a simple wooden frame.
- Install interlocking foam floor in a study corner.
Longer-term projects:
- Plan a full “sound wall” with layers, furniture, and panels.
- Build a removable window plug for heavy noise seasons.
You do not need a perfect room; you just need the noise to drop below the threshold where it controls your life.
Linking It Back To Floors and Walls
Every trick in this whole setup connects back to one of three physical levers:
- Mass: Thicker, heavier floors and walls block more sound.
- Absorption: Soft, porous materials on floors and walls soak up sound energy.
- Decoupling: Separating surfaces reduces vibration transfer.
Floors:
– Add layers (pads, rugs, foam).
– Add softness where impacts happen.
– Use furniture on floor contact points to control vibration.
Walls:
– Add thickness (bookshelves, panels, layered curtains).
– Soften surfaces (fabric, quilts, foam).
– Where possible, insert small air gaps between wall and added layers.
Once you start seeing your room as a system of surfaces instead of just “a box to sleep in,” noisy neighbors become a design problem, not an unchangeable curse.


