I remember staring at my suitcase the night before leaving for exchange and thinking: “There is no way my entire semester fits in here.” Then I realized half of what I wanted to pack was stress, not stuff.
Here is the honest answer: yes, you can live out of a carry-on for a semester, but only if you treat packing like a design problem. You pick a small set of clothes that mix well, cut your “just in case” items without mercy, plan to do laundry on a schedule, and accept that you will buy a few things once you arrive instead of dragging your whole life through three airports.
Step 1: Decide your rules before you even open the suitcase
During one boring lecture I caught myself planning my packing instead of taking notes, and I realized something: packing light is just applied constraints. If you do not decide your limits in advance, your suitcase will decide for you at the airport scale.
Here are the rules that make a carry-on semester actually workable:
- One carry-on suitcase + one personal item (backpack or tote). That is your universe.
- No item goes in your bag unless it works in at least 3 outfits or 3 situations.
- Anything heavy but soft (hoodie, big jacket) gets worn on travel days, not packed.
- You accept that you will do laundry every 7 to 10 days, not once a month.
- You budget a little money to buy local items instead of packing for every scenario.
If everything is a “must have”, nothing is. Your first job is to decide what you are willing to live without, not what you want to bring.
Carry-on constraints you cannot ignore
Airlines do not care that this is your big life adventure. They care about centimeters and kilograms.
| Item | Typical limit (check your airline) | What to aim for |
|---|---|---|
| Carry-on size | ~55 x 35 x 23 cm | Suitcase that fits under stricter European limits |
| Carry-on weight | 7 to 10 kg on many airlines | Pack for 7 kg, not 10 kg |
| Personal item | Backpack/laptop bag that fits under seat | Backpack that you can carry for hours |
You want a suitcase that fits the strictest common denominator, not the most generous airline. Otherwise your “semester kit” might fail its first connecting flight.
Step 2: Build a minimalist wardrobe that actually works on campus
I used to think a “capsule wardrobe” was an Instagram myth until I tested it on exchange. It turns out you do not need 30 pieces; you need maybe 20 smart ones that share the same color logic.
Pick a color system so everything mixes
If your clothes cannot be mixed, you will need more of them. That is physics plus laundry.
Your semester wardrobe is not about fashion statements, it is about combinations: fewer items, more outfit options.
A simple pattern that works:
- Base neutrals: black, navy, gray, or beige. Pick 2.
- Light neutral: white or light gray for shirts and tops.
- 2 accent colors: something you actually like wearing, but that does not clash with your base.
For example:
| Type | Colors | Why it works |
|---|---|---|
| Base | Navy, gray | Both work with almost any shirt color |
| Light neutral | White | Bright, easy to layer under everything |
| Accents | Forest green, burgundy | Add personality but still calm and wearable |
If every top can go with every bottom, then suddenly 5 tops and 3 bottoms give you 15 outfits, not 5.
The actual clothing checklist (that fits in a carry-on)
This list works for most temperate climates. Adjust the warm vs cold ratio, but keep the total similar.
Tops
- 3 basic t-shirts (neutral colors)
- 2 nicer tops/shirts for presentations or going out
- 1 long-sleeve T or light sweater
- 1 heavier sweater or fleece for cold classrooms
Bottoms
- 2 pairs of jeans or chinos
- 1 pair of casual trousers or joggers
- 1 pair of shorts or a casual skirt (climate dependent)
Layers & outerwear
- 1 hoodie or zip-up sweatshirt
- 1 packable rain jacket or windbreaker
- 1 slightly nicer jacket or blazer if your program has semi-formal events
Underwear & sleep
- 7 to 10 pairs of underwear
- 4 to 6 pairs of socks (more if very cold)
- 1 to 2 sports socks
- 1 set of sleepwear
Sports & swim
- 1 set of workout clothes (2 if you exercise often)
- 1 swimsuit
Shoes
- 1 pair of everyday sneakers (wear on plane)
- 1 pair of compact dressier shoes or flats
- Optional: 1 pair of lightweight sandals or flip-flops
If a shoe is heavy, only bring it if you will wear it at least twice a week. If not, it stays home.
Special cases: cold, warm, or unpredictable weather
This is where people panic and overpack. A better approach is to think in terms of “smart layers”:
- Cold climate: add thermal leggings, thermal top, and a packable down jacket that compresses into a small bag.
- Warm climate: prioritize breathable fabrics, add one sun hat, one ultralight long sleeve for sun and over-air-conditioned rooms.
- Rainy place: a truly waterproof shell is better than three “kind of waterproof” jackets.
You do not need 5 heavy sweaters. You need one good outer layer plus thin layers underneath.
Step 3: Strategy for toiletries and liquids (where most people waste space)
The liquid rules are brutal but predictable: each container 100 ml or less, all of them inside a 1 liter clear bag.
If your toiletry bag looks like a traveling pharmacy, you are carrying your anxiety, not your essentials.
Liquids to pack vs buy on arrival
Think of liquids in two groups.
Pack (travel size, hard to find or personal preference)
- Prescription creams or medicated products
- Favorite face wash if your skin is sensitive
- Contact lens solution in travel size, if you have a specific brand
- A tiny bottle of shampoo and body wash, just for the first few days
Buy when you arrive
- Full-size shampoo and conditioner
- Body wash
- Bulk skincare like body lotion
- Extra sunscreen if you need a lot
You only need enough liquid products to cover you from landing to your first grocery store trip.
Solid alternatives that save liquid space
Switching from liquid to solid versions of products frees up your whole liquid allowance.
- Solid shampoo bar and conditioner bar
- Solid bar soap instead of body wash
- Solid deodorant instead of spray
- Solid perfume stick instead of a glass bottle
- Solid toothpaste tabs or just a small regular tube
Pack them in a small, ventilated soap box or a simple tin.
Minimal toiletry checklist
Non-liquid items
- Toothbrush
- Compact hairbrush or comb
- Razor with cover
- Nail clippers
- Solid deodorant
- Any solid bars (soap, shampoo, conditioner)
Liquids (100 ml or less each)
- Face wash
- Moisturizer with SPF
- Small bottle of shampoo or multi-use soap (for first few days)
- Contact lens solution, if needed
- Travel-size sanitizer
- Any prescribed liquid medicines
If you wear makeup, pick a small kit that fits in a palm-sized bag: 3 to 5 products, not a full vanity.
Step 4: Tech and study gear without turning into a walking electronics store
This is where students quietly overpack. A second laptop, a DSLR, a tablet, noise-cancelling headphones, a Bluetooth speaker, three chargers, two hard drives. That is half your backpack weight before you even add notebooks.
Tech should help your semester, not become a second suitcase you carry on your shoulders every day.
The lean tech setup
Core items that most students actually need:
- Laptop (lightweight, decent battery)
- Charger with a compact extension cord or small power strip
- Phone + charging cable
- Universal plug adapter for the host country
- Light headphones or earbuds
- USB stick or one small SSD if your work requires it
Ask yourself uncomfortable questions:
- Do you really need a tablet if your laptop is light?
- Are you actually going to use a DSLR weekly, or is your phone camera enough?
- Will you really need a big gaming headset, or are you just attached to it?
Study materials without the dead weight
The secret is to stop treating paper as default.
- Do not bring physical textbooks; buy used locally or use digital versions.
- Scan or photograph any reference notes at home and save them digitally.
- Bring 1 small notebook or journal, not 5.
- Pack 2 or 3 pens, 1 highlighter, not a full pencil case.
If your program insists on heavy specific books, you can:
- Check if the host library has them.
- Coordinate with classmates to share or rotate.
- Have family ship one box later if it is absolutely required, instead of carrying it through three airports.
Step 5: Smart packing techniques that make everything actually fit
You can have the perfect list and still lose the Tetris game inside your suitcase. Packing style matters more than people admit.
Rolling vs folding vs packing cubes
People argue about this like it is philosophy. The reality:
- Rolling is great for casual clothes and small gaps.
- Folding flat works better for structured items like blazers or button-downs.
- Packing cubes help you compress and keep categories separate so you do not explode your bag in the hostel hallway.
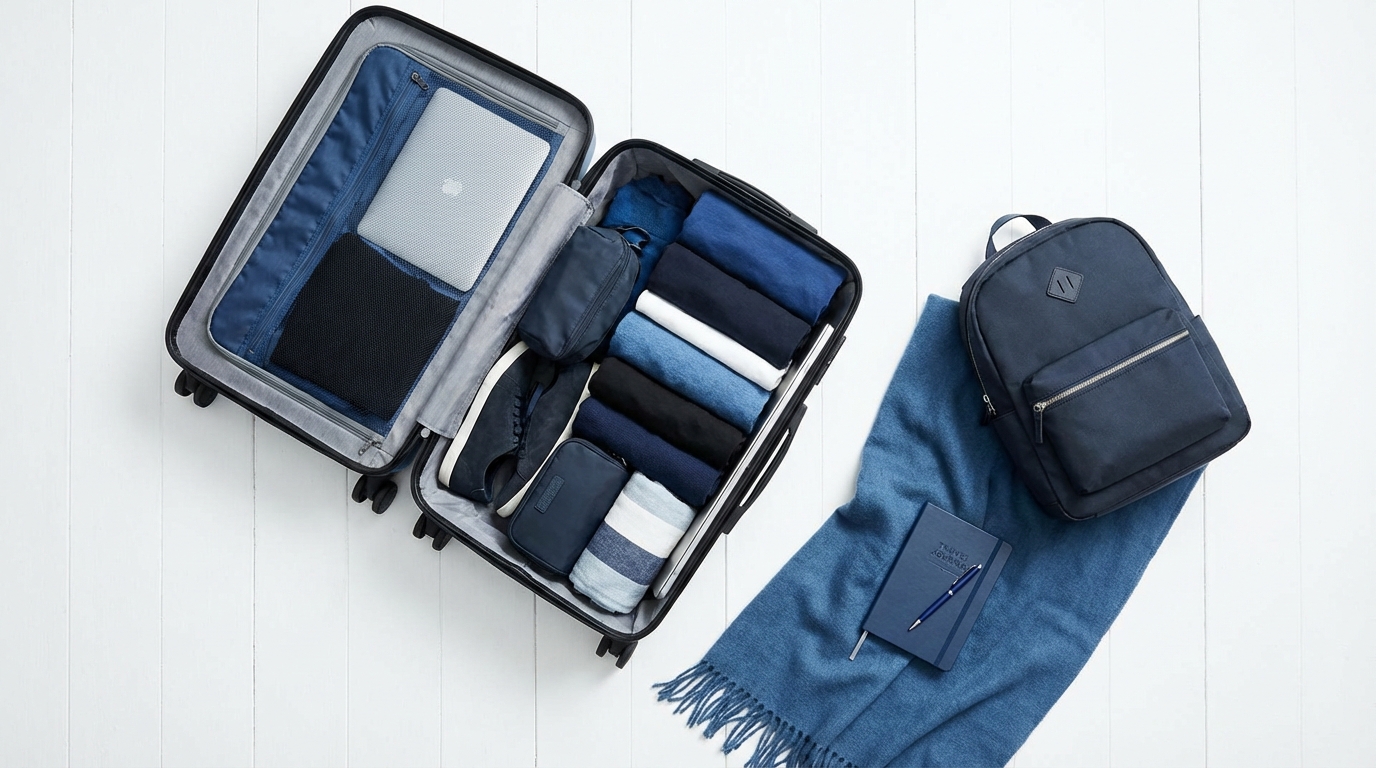
A simple structure that works:
| Area | What goes there | Why |
|---|---|---|
| Bottom of suitcase | Shoes, heavy items, packing cube with jeans | Keeps center of gravity low |
| Middle layer | Packing cubes with tops and underwear | Main clothes stack, easy to access |
| Top layer | Jacket, hoodie, last-minute items | Easy access through security checks |
| Outer pockets | Liquids bag, documents | Quick removal at security |
The “personal item” strategy
Your backpack is more than a laptop container. It is your daily campus bag and your overflow storage.
Pack it for both travel day and regular class days:
- Laptop + charger
- Documents folder (passport, visa, printouts, some local currency)
- Pen + small notebook
- Phone, headphones
- Snacks, empty water bottle (fill after security)
- One full change of clothes in case your carry-on gets gate-checked and delayed
Assume your suitcase might be taken from you at the gate. Your backpack should contain what you need to survive one night without it.
Step 6: Laundry logistics and not running out of clothes
There is a point at week two where carry-on students either feel smart or start running out of socks. The difference comes from how you think about laundry.
Plan for a 7 to 10 day clothing cycle
You do not need 30 days of clothes if you wash weekly. Simple math:
- 7 to 10 underwear pieces = 1 load per week
- 4 to 6 pairs of socks = same schedule
- 3 to 5 tops in rotation
- 2 to 3 bottoms that you re-wear between washes
Most people wear jeans or trousers 3 to 5 times before washing, unless something spills on them. That is not being messy; that is normal.
Have a micro-laundry kit
You do not need a whole laundry room in your suitcase, just:
- Small pack of laundry detergent sheets or a travel bottle of liquid detergent
- Foldable or travel clothesline with clips
- 2 or 3 extra clothespins
This lets you:
- Wash underwear and socks in the sink during travel weeks.
- Handle emergencies when a washing machine is broken or busy.
Laundry in student housing
Before you leave, find out:
- Is there laundry in the dorm or nearby?
- Do you need coins, a card, or an app?
- How many machines, and do they get crowded on weekends?
Then you can build this into your weekly rhythm: for example, laundry during a reading break, or on a quiet weekday morning.
Step 7: What to leave behind (even if it hurts a little)
This is the part that most students avoid. They keep adding things, hoping somehow the laws of physics will bend.
If you feel resistance letting something go, ask: do I want to carry this through every train station for four months?
Clothes you probably do not need
- More than one heavy coat. Bring one that layers well.
- More than two pairs of jeans. They take space and dry slowly.
- “Maybe” outfits that require specific shoes or accessories.
- Multiple formal outfits. One flexible set usually covers it.
For formal events, one clean, simple set:
- For “smart casual”: one neutral button-down and dark jeans or chinos.
- For stricter dress codes: one compact dress or blazer + trousers combination.
Random items that seem useful but rarely get used
- Bulky towels (get a compact travel towel or use dorm towels).
- Full-size hairdryer or styling tools (check if the dorm provides them or share locally).
- Huge first aid kits (bring a small one; pharmacies exist abroad).
- Multiple extra bags (one tote inside your backpack is enough).
You are not moving to a deserted island. There will be shops.
Step 8: Buying and swapping once you arrive
On my exchange I realized something slightly humbling: my host city had stores. Real ones. With clothes, chargers, notebooks, and even socks. I did not need to predict every scenario before boarding.
Budget for “local adjustments”
Bring 90 percent of what you need. Plan to get the last 10 percent once you arrive:
- Cheap umbrella
- One extra sweater if it is colder than expected
- Local SIM card or cheap phone plan
- Desk lamp or storage bins for your room
Set aside a small budget for these instead of stuffing them into your carry-on.
Use second-hand and student networks
Student communities are like constant swap markets if you pay attention:
- Second-hand shops for warm layers or formal wear.
- Campus groups or chats where people sell last semester’s items.
- Roommates who bought things in bulk and are happy to share costs.
The smarter move is not to guess everything in advance. It is to arrive with margin: space in your bag, room in your budget, and flexibility in your plan.
Step 9: Security, documents, and “cannot lose this” items
Some objects are more critical than any shirt or shoe. Losing them is worse than losing half your wardrobe.
The document stack
You need a small, flat folder for:
- Passport + copies
- Visa documents (if needed)
- Offer or acceptance letters
- Insurance details
- Emergency contacts and addresses written on paper
Keep this folder in your backpack, never in your suitcase.
Take photos and digital copies of all of it, saved in:
- Your phone
- Cloud storage
- An email to yourself
Money and backups
A minimal but safe setup:
- 1 main card
- 1 backup card stored in a different place in your bag
- Some local currency in cash (enough for transport + 1 or 2 days)
Pack them in separate locations, so one lost wallet does not end your semester.
Step 10: Running a test week before you leave
The most honest way to see if your packing plan works is to simulate it.
If you cannot live one week at home using only the clothes and items you packed, they will not magically become enough once you land in another country.
The “practice semester-lite” test
One or two weeks before departure:
- Pack your carry-on and backpack as if you are leaving.
- For the next 7 days, only use what you packed.
- Do laundry on the same schedule you expect abroad.
You will quickly notice:
- Which clothes you reach for all the time.
- Which items you packed “just in case” and never touch.
- If your laundry schedule feels reasonable.
- Which missing item is actually important.
Then you adjust: remove the dead weight, add the missing essentials, and close the suitcase again.
Step 11: Mental shift: from “packing everything” to “trusting your future self”
Packing light for a semester is not mainly about space. It is about how much trust you place in your own ability to figure things out once you arrive.
You are not trying to predict every outfit, every weather change, or every social event. You are building a flexible base set of tools, clothes, and habits that let you adapt on the fly.
In a weird way, living out of a carry-on pushes you to think like a founder testing a prototype:
- You start with a minimal version that covers the core use cases.
- You cut nice-to-have features that add weight but not real value.
- You launch, watch what actually happens, and only then add what is truly needed.
The carry-on is that minimal version of your “semester self”. Not perfect, not complete, but ready enough to get on the plane and build the rest once you land.


