I was staring at my tiny room at 1 a.m. and realized it felt less like a bedroom and more like a storage closet with Wi-Fi. You know that moment when you sit on your bed, look around, and think: “Why does this feel so cramped when it has the same square footage as everyone else’s room on the floor?”
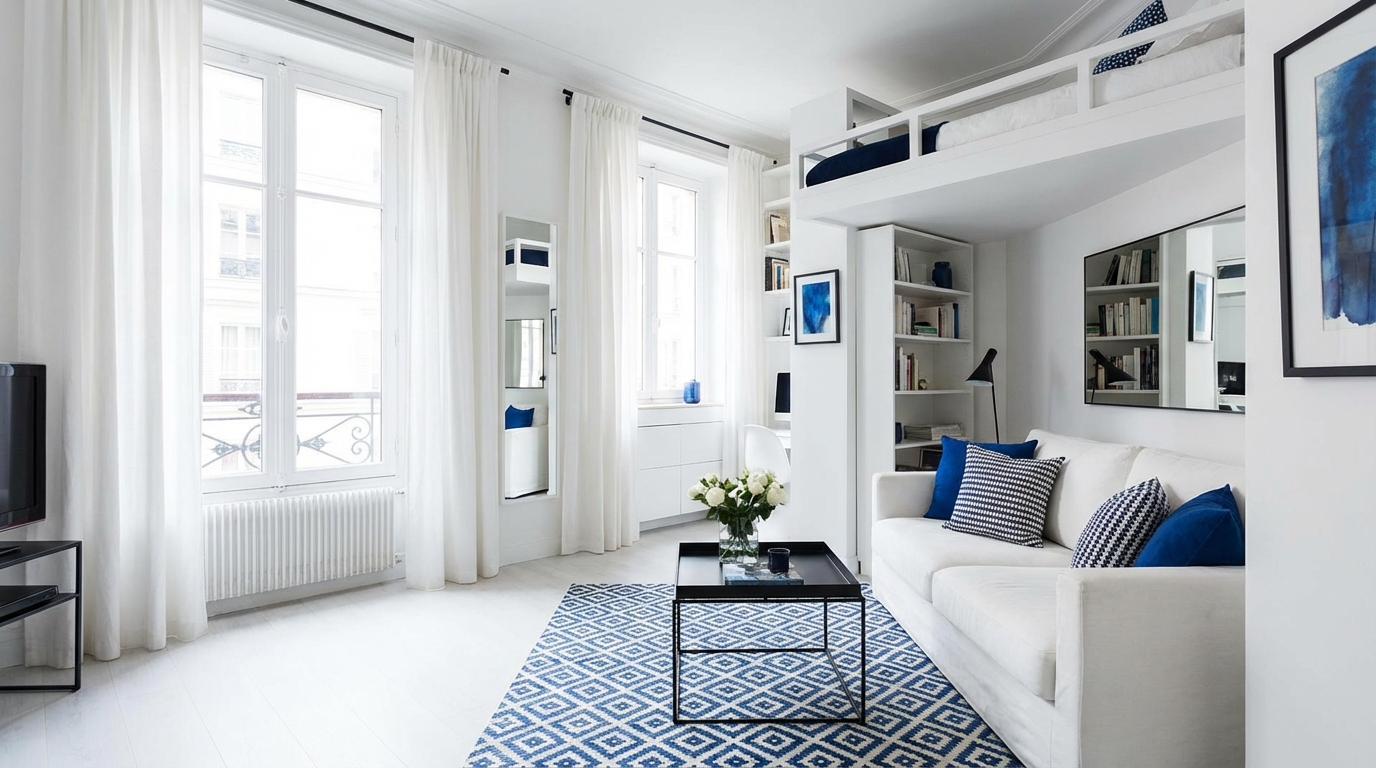
Here is the short version: a tiny room feels big when you control three things with intent: what comes in (stuff), what you see (visual lines, light, color), and how each piece of furniture does double or triple duty. If you treat your room like a 3D puzzle and not just a box, you can make even a dorm or studio feel open, calm, and actually livable.
Small rooms do not have a space problem. They have a decision problem: every item, color, and angle is either helping the room feel bigger or shrinking it.
Step 1: Decide What Your Tiny Room Is Actually For
In one architecture lecture, the professor said: “Space is not just area, it is priority.” That hit me later when I tried to turn my room into a bedroom, office, cinema, gym, storage unit, and dining hall at the same time.
If you try to make a small room do everything, it ends up doing nothing well. So the first move is not buying furniture. It is choosing functions.
Clarify Your Top Functions
Ask yourself, very bluntly:
- Is this room mostly for sleeping and relaxing?
- Do I need a serious study/work setup here?
- Do I actually host people often, or just imagine I will?
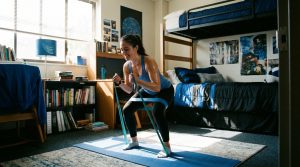
- Do I need workout space inside this room, or can that move somewhere else?
Now pick a maximum of 2 primary functions and 1 secondary. More than that and the room starts to feel like a crowded group project.
Example:
| Priority level | Function | Design focus |
|---|---|---|
| Primary 1 | Sleep / recharge | Comfortable bed, calm lighting, uncluttered sightlines |
| Primary 2 | Study / work | Desk with good light, ergonomic chair, cable control |
| Secondary | Host 2-3 people | Flexible seating, movable table, foldable chairs |
If you do not decide what the room is for, random objects will decide for you.
Once the function is clear, you can judge every item by one simple question: “Does this help with one of those priorities, or is it just existing here out of habit?”
Step 2: Shrink Your Stuff Before You Try To Expand Your Space
It felt slightly painful the first time I did this, but the fastest way to make a tiny room feel big is to reduce what is inside it. Not in a hardcore minimalist way, but in a practical “this room is expensive real estate” way.
The One-Bag Test
Stand in your room and ask: if I had to leave campus for a semester and could only keep one suitcase of things in this room, what would stay?
You do not have to actually follow through with that, but it reveals priorities fast.
Then run these filters:
- Daily use: Do I use this every single day?
- Weekly use: Is this useful at least once a week?
- Semester use: Do I genuinely need this at least once a term?
- Imaginary use: Is this here because I like the idea of using it, more than the reality?
Everything in the “imaginary use” category is a space vampire. It steals volume that your room could use to breathe.
Hide, Store, or Let Go
Once you sort items, give them one of three fates:
- Visible and proud: Daily things that look fine on display.
- Hidden but close: Weekly or semester items stored in boxes, bins, or drawers.
- Gone: Items to donate, sell, or send home.
A small room feels bigger when fewer things live on the floor and more things live inside other things.
If the floor is full, no design trick will make that feel spacious. Start with subtraction, not decoration.
Step 3: Use Vertical Space Like a Tetris Pro
In a small room, the floor is crowded, but the walls usually are not. I realized I was treating my walls as poster holders instead of functional surfaces.
The goal: get as much as possible off the floor and onto the walls, door, and vertical structures.
Think From Floor to Ceiling
Here is how to plan vertical storage, starting from eye level and moving both up and down:
- Eye level: Only light and visually calm items. Open shelving here should hold books, plants, or a few nice objects, not piles of random stuff.
- Above eye level: Closed storage. Bins, boxes, soft baskets. Things you do not need daily.
- Below desk / bed level: Hidden storage. Under-bed boxes, rolling bins, small drawers.
You want the “visual noise” pushed either up high or down low, not in the direct center of your field of view.
Simple Vertical Space Ideas
- Over-door hooks: For bags, jackets, towels. Choose a single color to keep it tidy.
- Wall-mounted shelves: Light pieces only, and do not overload. Leave some gaps so it does not look heavy.
- Pegboards or rail systems: Above a desk for stationery, headphones, small tools.
- Bedside pocket organizers: Hanging fabric pockets instead of a full bedside table.
Your room feels taller when your walls are doing some of the storage work instead of your floor.
If you are in a dorm with rules against drilling, look for command hooks, tension poles, or over-door units. No power tools, less deposit risk.
Step 4: Furniture That Works Twice As Hard
I used to think furniture was about comfort first. In a small room, furniture is about function first and comfort right behind it.
The basic rule: if a piece only does one thing, it needs to do that one thing extremely well. Otherwise, make it do at least two things.
Types of Multi-Use Furniture
- Bed with storage: Drawers, lift-up frames, or at least enough clearance for boxes.
- Desk that can flex: A table that can serve as both a work desk and a dining surface.
- Ottoman or bench with storage: Extra seating + hidden compartment.
- Folding or stackable chairs: For guests, then flat against a wall when not used.
- Nesting tables: Smaller tables that tuck into a larger one, instead of multiple separate side tables.
In a tiny room, every big piece of furniture needs a secret second job.
Scale and Proportion Matter More Than You Think
A common mistake is using furniture that is slightly too large. Just a few inches off, and the room suddenly feels cramped.
Watch for:
- Depth of furniture: A 24 inch deep desk instead of 30 inches can change the circulation space.
- Height of items: Lower, longer furniture can make ceilings feel higher.
- Visual weight: Thin legs and open bases feel lighter than big solid blocks.
Example:
| Furniture choice | Feels smaller | Feels larger |
|---|---|---|
| Bed style | Platform on the floor | Bed on legs so you see floor underneath |
| Storage | Deep, bulky dresser | Tall, narrow dresser or closet organizer |
| Seating | Large armchair | Compact chair with visible legs |
When you can see more floor underneath or around furniture, your brain interprets the room as more open, even if the actual dimensions are the same.
Step 5: Control Sightlines Like A Stage Designer
At some point I realized my room problem was not the total area but the “first glance.” The first 2 seconds when you open the door matter a lot.
If your eye hits a wall of clutter or tall objects, the room feels tight. If your eye moves smoothly across the room with some clear floor and vertical lines, it feels bigger.
Plan the “Door View”
Stand outside your room. Open the door slowly and notice:
- What is the first big thing you see?
- Is the bed directly in front of you or off to one side?
- Is the floor visible, or blocked by stuff?
Try to arrange your main pieces so that:
- You see as much open floor as possible from the doorway.
- Tall items are along the sides, not directly facing you.
- The messier zones (laundry basket, storage bins) are not in direct view.
If the first glance is calm and open, your brain fills in “this room is spacious” before it notices the actual size.
Keep Pathways Clear
Your room should have at least one clear, unobstructed path from the door to:
- The bed
- The desk or main workspace
- The window
Avoid furniture that sticks out into walkways in awkward angles. Rounded corners help, but the main thing is not forcing yourself to twist around items.
This is where measuring helps. Use your phone to sketch the layout and mark out at least 24 inches (about 60 cm) for pathways.
Step 6: Light Is Your Secret Weapon
During one late night study session I turned off the harsh overhead light and just used a desk lamp and a floor lamp. The room instantly felt bigger and calmer. Nothing had moved, but the atmosphere changed.
Light changes how your brain reads depth.
Use Layers of Light
Instead of only relying on a single ceiling light, build at least three types of lighting:
- Ambient light: General background illumination. This could be a floor lamp, wall lights, or string lights used thoughtfully.
- Task light: Focused light for working, reading, getting ready.
- Accent light: A small lamp for mood, or to highlight a plant or artwork.
Try to avoid heavy shadows in corners. Dark corners make the boundaries of the room feel closer. Lighting up corners makes them recede.
Work With Natural Light, Not Against It
If you have a window, treat it like premium property:
- Keep the area directly in front of the window as open as you can.
- Use light curtains that let daylight through.
- Avoid tall, dark furniture that blocks the window frame.
When your window is clear and bright, the room feels like it extends to the outdoors instead of stopping at the wall.
If your room has almost no natural light, lean into warm, layered lighting instead of a single bright overhead bulb. It will not change the size, but it will change how dense the room feels.
Step 7: Color, Contrast, And The Illusion Of Depth
I used to think “small room = white everything.” That helps, but it is only part of the story. The way you use color and contrast can either stretch the room or flatten it.
Light, Medium, Dark: Pick a Simple Palette
Pick:
- One light base color: For walls and large surfaces. White, off-white, pale gray, soft beige, or a very light pastel.
- One or two mid tones: For bedding, curtains, rugs.
- One darker accent: For a few items like a chair, frames, or a throw blanket.
Too many random colors chop the room into pieces. A tighter palette lets the eye glide.
| Element | Better for space | Feels more cramped |
|---|---|---|
| Bedding | Solid or simple pattern in light / mid tone | Very busy, high-contrast pattern |
| Rug | Light or mid-tone, close to floor color | Very dark rug on light floor |
| Storage boxes | Matching or similar tones | Mixed bright colors |
Use Contrast Strategically
Too little contrast can feel flat and dull. Too much can feel chaotic. The trick is to place contrast where it creates depth:
- Darker objects closer to you, lighter objects further back can make the wall feel further away.
- A slightly darker floor or rug with lighter walls can ground the room.
- Frames or shelves that match the wall color feel more “built in” and less bulky.
Color is not just decoration. It is a tool for tricking your brain about where the walls begin and end.
If you are allowed to paint, one useful tactic is a single accent wall behind the head of the bed or behind the desk. Keep it only slightly darker than the other walls so it adds depth without making the room feel narrower.
Step 8: Mirrors, Reflections, And Visual Tricks
At some point I realized interior design is basically legal cheating. You cannot stretch walls, but you can stretch what your eyes think they see.
Mirrors are one of the most direct ways to do that.
Where To Put Mirrors
Some placements help more than others:
- Across from a window: Doubles the light and extends the view.
- Near a corner: Makes that corner feel deeper.
- On a closet or door: Keeps floor space free.
Try to avoid placing a mirror where it mainly reflects clutter. That just repeats the mess.
Other Visual Tricks
You can use lines and patterns to change how the room feels:
- Vertical lines: Curtains hung higher than the window frame draw the eye up.
- Horizontal lines: A low, wide shelf can make a narrow room feel wider.
- Large-scale art: One bigger piece of art can make a wall feel taller and less busy than many small pieces.
If you repeat long, clear lines in the room, your eye travels further, and the room feels larger than it is.
Avoid too many tiny items spread across every surface. Think fewer, larger objects instead of lots of tiny ones.
Step 9: Surfaces, Clutter, And The “Reset” Habit
I noticed that my room did not slowly get messy. It jumped from “fine” to “chaos” in about two days. The trigger was always the same: flat surfaces.
Surfaces attract objects like gravity. Desk, top of dresser, bedside table, chair. Once those fill up, the floor is next.
Give Everything A Home
You have probably heard that advice before, but in a small room it is less about “being tidy” and more about “preventing spatial collapse.”
For each category, designate a home:
- Backpack / bag: Hook, chair back, or a specific corner.
- Jackets / hoodies: Door hook or hanger, not the chair.
- Daily tech: Single basket or tray for chargers, headphones, mouse.
- Small random objects: One “junk” box with a lid so clutter is at least contained.
A small room stays livable when “Where does this go?” has a clear answer for almost everything you touch.
The 5-Minute Night Reset
Instead of long cleaning sessions, do a fast nightly reset. Set a 5 minute timer, then:
- Clear the desk surface.
- Put all clothing into only three places: closet, drawer, or one single laundry basket.
- Return items to their assigned storage homes.
Once this is a habit, the room rarely hits that “disaster zone” level that instantly makes it feel small and stressful.
Step 10: Zoning One Room Into Several “Mini Zones”
One of the smartest tricks I picked up was from watching how good cafes are laid out. It is one room, but your brain reads different zones: work, talk, relax.
You can do the same thing inside a tiny bedroom without chopping it up.
Create Visual Zones Without Walls
You can use:
- Rugs: One rug under the bed zone, a different (smaller) one under the desk area.
- Lighting: Desk lamp turned on feels like “work mode,” warm bed lamp feels like “rest mode.”
- Furniture placement: Desk facing a wall for focus, chair angled toward the window for breaks.
Think of it as writing a floor plan: sleep zone, work zone, storage zone. Each zone answers “What happens here?” clearly.
Do Not Block The Flow Between Zones
Zoning should help your brain, not trap your body. Make sure:
- You can walk between zones without weird detours.
- No zone is just a pile of random items.
- The storage zone is functional, not a dumping ground.
If a zone is not working, redraw it. Move the rug, rotate the desk, shift the chair. Small changes in a small room make big differences.
Step 11: Digital Life, Physical Space
I realized a lot of my clutter was actually analog versions of things that had already moved to my laptop.
Once you notice that, you can free up a surprising amount of space.
Go Light On Physical Media
Ask yourself:
- Do I need this many physical books, or can some live as PDFs or ebooks?
- Do I need printed notes stacked, or can I scan and archive them?
- Can I use one small printer in a shared space instead of having one in my room?
You do not have to go completely digital, but every binder or stack you remove gives you back space for air and movement.
Cable Control
Messy cables shrink a room visually more than you expect. They create tangles that break clean lines.
Simple fixes:
- Use cable clips along the back of the desk.
- Bundle long cables and hide them in a small box or behind furniture.
- Assign one small area as your charging station.
Your room will not suddenly gain square feet, but it will feel more deliberate and less chaotic.
Step 12: Personal Style Without Making It Feel Crowded
There is a tension here: you want the room to feel larger, but you also want it to feel like yours. Not like a generic catalog photo.
The key is to compress the “visual story” into a few strong elements instead of spreading it everywhere.
Pick a Few “Hero” Items
Choose 3 to 5 things that express you clearly:
- A favorite poster or piece of art.
- A plant you actually keep alive.
- A patterned pillow or blanket.
- A meaningful object on the shelf.
Let those stand out, and keep the background calm.
Personal style in a small room is about editing, not removing. You highlight a few things instead of displaying everything you own.
Handle Collections Carefully
If you collect anything (pins, stickers, books, prints), group them instead of scattering them.
- One pin board, not pins on every surface.
- One shelf with books lined up, not stacks across the room.
- One gallery wall cluster, not random photos on every wall.
When items of the same type are grouped, your brain reads them as one unit instead of many tiny separate pieces. That keeps the room from feeling visually noisy.
Step 13: A Quick Layout Checklist
Here is a practical pass you can run through in your own room.
Layout Checklist
- From the doorway, do you see open floor and not just the side of a bed or a pile of clothes?
- Is there at least one clear path to the window, bed, and desk?
- Are tall, heavy items pushed against walls, not floating in the middle of the room?
- Can you see under at least one or two pieces of furniture (bed, chair, or dresser) to show more floor?
- Is the window area open, not blocked by deep furniture?
- Do the biggest colors in the room feel related, not random?
- Are your daily items stored in easy reach, not buried under weekly or “someday” items?
If you answer “no” to several of these, that is not a failure. It is just a clear to-do list.
Step 14: Common Mistakes That Secretly Shrink Your Room
I wish someone had pointed these out earlier, so I will be blunt about them.
Buying Storage Before Editing Possessions
If you start by buying drawers, shelves, and boxes, you often end up storing things you did not need to keep in the first place. That gives you less space and more objects to manage.
Fix: do a quick round of letting things go first, then measure and buy storage that fits what remains.
Too Many Small Rugs
Many small rugs break the floor into patches and make the room feel chopped up.
Fix: use one larger rug that covers a clear zone, or two at most that have a clear purpose.
Dark Curtains That Block Light
Heavy dark curtains in a small room without much natural light compress the space.
Fix: use lighter curtains, maybe with blackout liners that can pull across only when you need darkness.
Overloaded Open Shelving
Open shelves packed edge to edge with items look heavy and cramped.
Fix: leave some negative space. Use boxes or baskets for small items so the shelf looks cleaner.
Ignoring Ceiling Height
If you are lucky enough to have higher ceilings, but all the visual action is down low, the room still feels flat.
Fix: hang curtains higher, place some art or shelves above eye level, and let the vertical dimension work for you.
Step 15: Turning Design Into A Small Experiment
The nice thing about campus or early-apartment life is that nothing is permanent. Your layout will change as your routines change. That is not a problem, it is a feature.
Think of your room as a living prototype.
Run 24-Hour Experiments
Try small changes one at a time:
- Move the desk to face a wall or window and live with it for one day.
- Clear everything from one surface and see how that feels.
- Reposition one lamp and test how the room feels at night.
After each experiment, ask:
- Did the room feel more open or more cramped?
- Did I move more easily, or did anything get in the way?
- Did I feel more focused, or more distracted?
Your goal is not the “perfect” layout, but a layout that fits how you actually live this semester, not how you imagine you might live someday.
A tiny room that matches your real routines will feel bigger than a larger room that fights you all day.
If you treat your space like a small design problem rather than a fixed limitation, every tweak becomes a kind of low-risk experiment. And every experiment that works is one step closer to that moment when you walk into your tiny room and it finally feels like a personal studio, not a storage box with a bed.
