I was staring at the pile of laundry, textbooks, and random tech cables on my floor and suddenly realized: the problem was not the room, it was the air above my desk. Empty. Wasted. Just floating there, mocking me.
If your dorm or shared apartment feels cramped, the fastest win is this: start building *up*, not *out*. The more you shift storage onto walls, doors, and vertical frames, the more floor space you free for actual living, studying, and creating.
Why vertical storage changes the game in small student spaces
I realized during a lecture on architecture that rooms have two dimensions we obsess over: length and width. But most students ignore the third one: height. We treat walls like decoration boards instead of storage real estate.
Once you flip that mental switch, everything changes:
- Your floor gets cleaner because things have a clear “up there” home.
- You can fit more gear (books, clothes, lab stuff, startup gadgets) into the same room without it feeling like a storage unit.
- You create zones: study up here, clothes over there, project gear by the door.
If your floor feels crowded, your walls are probably underused.
The rest of this guide walks through practical vertical storage moves you can set up in a weekend with a student budget and minimal tools. No interior design fluff, just things that actually work in dorms and student houses.
Step 1: Understand your vertical “real estate”
Before buying anything, map your room like a builder, not a shopper. You are not just “decorating”; you are designing a 3D layout.
Audit your walls and height zones
Stand in the middle of your room and look around like you are scanning for wall space in a crowded library.
Think in height bands:
| Height band | Approx. height | Best for |
|---|---|---|
| Floor to knee | 0 – 50 cm | Rolling bins, low shelves, shoes, under-bed storage |
| Knee to shoulder | 50 – 140 cm | Daily-use items, open shelves, hooks for bags |
| Shoulder to eye | 140 – 170 cm | Most-used books, small cabinets, whiteboards |
| Above eye level | 170 cm + | Rarely used stuff, seasonal clothes, archives |
Ask yourself:
- Which walls are completely empty or almost empty?
- Where can you reach comfortably without stretching on tiptoe?
- Where would shelves block doors, windows, or roommates?
Vertical storage only works if you can reach it without hating your life every day.
Sort your stuff by access frequency
Before you start drilling or sticking anything, decide what deserves eye-level space.
Split your belongings into three groups:
- Daily use: laptop, notebooks, chargers, main textbooks, everyday clothes, toiletries.
- Weekly use: lab gear, extra shoes, gym stuff, project materials, large reference books.
- Rarely used: seasonal clothes, sentimental items, spare bedding, old notes.
Now match groups to height:
- Daily use: between knee and shoulder height, closest to your desk or bed.
- Weekly use: just above or below that, reachable but not prime territory.
- Rarely used: high shelves, upper closet space, top of wardrobes.
If you put daily-use items above your head, you will end up stacking them on the floor “just for now” and your system will collapse within a week.
Vertical storage at the desk: protect your workspace
If you are a student, your desk is not just a desk. It is your office, lab bench, startup HQ, and dinner table. Keeping that surface clear is non-negotiable if you want to think straight.
Use the wall above your desk like a command center
That empty wall behind your laptop is serious territory. Treat it like a cockpit layout.
You can combine:
- Wall-mounted shelves: One or two simple boards with brackets for books and gear.
- Pegboard or grid panel: For small items, cables, tools, stationery, and notes.
- Whiteboard or corkboard: For tasks, deadlines, and quick sketches.
If your to-do list is buried in an app, it competes with every other notification. If it is on the wall, it stares at you while you procrastinate.
A pegboard or metal grid above the desk is especially strong for student life. You can hang:
- Headphones
- USB hubs and cables
- Index cards for project ideas
- Small containers with pens, markers, and sticky notes
- Spare chargers and adapters
Desk hutch or add-on shelves
If wall mounting is not allowed, you can still go vertical on the desk itself:
- Desk hutch: A shelf unit that sits on the back of your desk, giving you a second level for books and gear.
- Monitor riser with storage: Raises your screen and gives a shelf below for keyboard, notebooks, or a laptop.
- Stacked desk organizers: Modular trays or cubes that stack, rather than spread sideways.
Key principle: stack up, not out. If an organizer only works horizontally, skip it.
Vertical storage around the bed: from dead zone to storage hub
Student beds are usually terrible at two things: comfort and storage. You cannot fix the mattress easily, but you can turn the whole bed area into a vertical storage system.
Under-bed storage + above-bed storage
Think of your bed as a 3D block: under, beside, and above.
Under-bed:
- Flat storage boxes with lids for clothes, archives, and spare bedding.
- Rolling crates for heavy items like textbooks or hardware.
- Vacuum bags for seasonal clothes if you are tight on space.
Beside the bed:
- Hanging bedside caddy for phone, glasses, remote, notebook.
- Narrow vertical shelf or crate tower as a “micro nightstand”.
Above the bed:
- Single long shelf high enough to not hit your head when you sit up.
- Wall hooks for headphones or a small reading light.
Every time you put something on the floor “for now”, imagine it living in a labeled box under your bed instead.
Lofted beds: the vertical storage boss level
If your campus allows bed lofting and you are not afraid of heights, lofting gives you an extra layer of usable space.
Under a lofted bed you can fit:
- A full desk setup with shelves.
- A small sofa or reading chair and bookcases.
- Drawer units and plastic towers for clothes and tools.
Safety rules:
- Do not hang heavy shelves above your face area on a lofted bed.
- Do not overload one side with weight; distribute storage evenly.
- Check that any hooks or add-ons are rated for the bed frame material.
Walls as storage: shelves, rails, and hooks
Once you start to treat walls as storage, you have to be strategic. Not every wall needs to hold everything.
Shelves: how many and how high
Simple rule: one to three shelves per wall section is usually enough for a student room. More than that can look chaotic and make the room feel smaller.
When planning shelf height:
- Place the lowest shelf roughly at chest height above the floor if you stand, or just above your desk level if it is over a desk.
- Leave enough room between shelves for the tallest item you plan to put there plus a bit of clearance.
- Keep daily-use books closest to eye level when you sit at your desk or on your bed.
If the room has very strict rules about drilling, you have options:
- Tension pole shelves: Vertical poles between floor and ceiling with adjustable shelves.
- Over-the-desk or over-the-bed frames: Freestanding structures that wrap around furniture.
- Adhesive hooks with board laid across: Best for lightweight items only.
Hooks, rails, and vertical racks
Hooks are the simplest vertical storage tool and also the easiest to misuse.
Good uses:
- One hook per daily bag or backpack.
- One hook for your jacket or hoodie.
- Wall-mounted rail with S-hooks for headphones, caps, or small baskets.
Bad uses:
- Layering five jackets on one hook until it pulls off.
- Hanging heavy bags on cheap adhesive hooks.
- Turning every surface into a hanging colony of random objects.
Hooks should reduce clutter, not create visual noise. One hook, one item, clear purpose.
Rails with S-hooks are strong in small spaces. You can mount a rail above the desk or near the door and hang:
- Cable organizers
- Small hanging buckets for pens or tools
- Keys, masks, and lanyards
- Reusable bags for groceries
Closets and wardrobes: turning height into extra capacity
Most student closets are tall, half empty at the top, and cramped in the middle. That is pure wasted potential.
Add levels inside the closet
Think in layers:
- Ground level: shoes in vertical shoe racks or tiered shelves.
- Middle: hanging clothes on the main rod, plus an extra hanging rod below for shorter clothes.
- Top: storage boxes or fabric bins for things you rarely need.
Tools that help:
- Hanging shelf organizers: Fabric columns that hook on the rod for folded clothes or accessories.
- Tension rods: Add a second row of short hanging space for shirts and skirts.
- S-hook hanger chains: Stack multiple hangers vertically to fit more clothes in one spot.
If your top shelf is too high, use boxes with handles so you can grab and pull safely. Label them simply: “Winter”, “Sheets”, “Old notes”.
Door-mounted closet storage
Your closet door is a vertical surface that most people leave blank.
You can attach:
- Over-the-door shoe organizer: For shoes, but also cables, cleaning supplies, snacks, and small items.
- Hook racks: For bags, belts, scarves, and jackets.
- Hanging jewelry or accessory organizers: If you have lots of small pieces.
An over-the-door organizer is basically a vertical drawer: many pockets, one slim footprint.
Just check that the door still closes and does not hit other furniture when loaded.
Doors and backs of furniture: stealth vertical storage
When floor space is tiny, you start seeing “hidden” vertical spots: the back of a door, the side of a wardrobe, or even the inside of a cabinet door.
Room doors and bathroom doors
Over-the-door hardware is a student ally because it usually needs no drilling and moves with you.
On your main door, you can hang:
- Coat and bag hook racks.
- A hanging file pocket for mail, flyers, and forms.
- A small whiteboard or schedule board.
On bathroom doors (if shared), you can store:
- Towels on hooks or bars.
- Toiletry caddies that you grab for showers.
- Laundry bags hung high to keep floors clear.
Sides and backs of big furniture
Look at the sides of wardrobes, bookshelves, and even the fridge.
Use:
- Adhesive hooks on the side of wardrobes for bags or hats.
- Magnetic organizers on metal surfaces like mini-fridges for spices, cutlery, or notes.
- Command strips with small baskets on the side of a desk for power strips or cable catchers.
You can even hang a slim vertical shoe organizer on the side of a wardrobe for small items: tools, tech gadgets, chargers, or toiletries.
Vertical storage for student projects and startup gear
If you are building something on campus, your “stuff” multiplies faster than you expect. Sensors, prototypes, samples, flyers, merch, random hardware. It can swallow a small room.
Vertical systems keep your project from invading every flat surface.
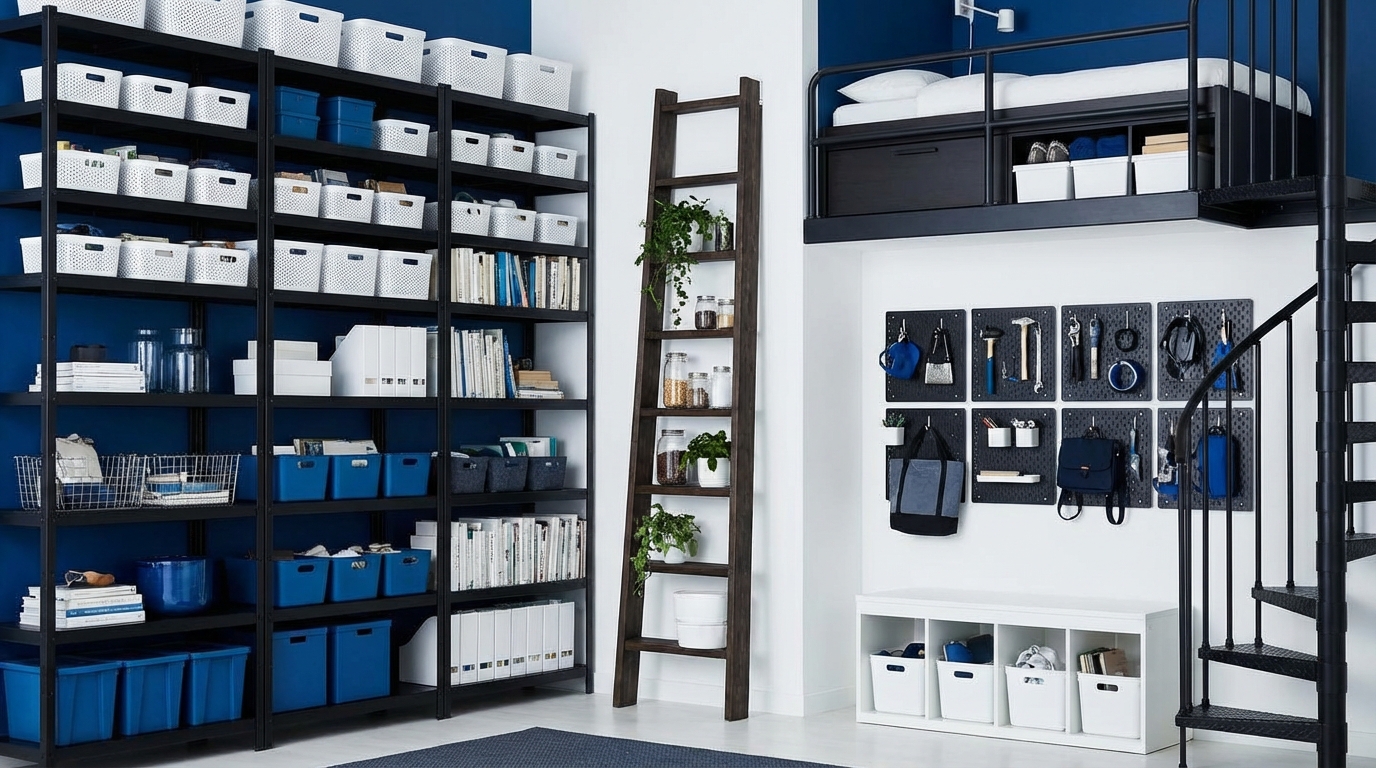
Grid panels and pegboards for tools and gadgets
Pegboards are not just for garages. They work well for student maker setups.
You can mount a panel above a desk or even lean it against the wall and secure it.
Store:
- Small tools: screwdrivers, pliers, tape.
- Electronics: cables, adapters, multimeter.
- Project parts in labeled cups or bins.
If project parts live in a tangled box, you will avoid working on the project. Visibility increases momentum.
Use clear or open containers. Being able to see parts at a glance helps your brain track the project, even when you are busy with exams.
Vertical document and sample storage
For reports, flyers, printouts, or physical samples, think wall-mounted instead of stacking on the floor.
Options:
- Wall file organizers with multiple tiers.
- Magazine racks mounted vertically.
- Hanging clips suspended from a rail for quick access to designs or posters.
If your startup or club has posters or physical boards, store them in a tall vertical bin instead of flat piles that get damaged.
Using height without overwhelming your room visually
There is a trap with vertical storage: you can make the room feel “taller but busier”. The goal is more order, not vertical chaos.
Group items vertically with a clear logic
Try this rule: each vertical zone should have one clear theme.
Examples:
- Wall above desk: study and project zone.
- Wall by the bed: personal items and reading zone.
- Back of door: leaving-the-room zone (keys, bags, jacket).
If every wall holds a random mix of snacks, books, cosmetics, and gym gear, your brain has to work harder to find things.
Use containers to “smooth out” visual noise
Open shelves can look messy if every item is visible. Containers fix that.
Simple tactics:
- Use the same style or color of box or bin on a shelf to make it feel ordered.
- Label boxes clearly, even with simple sticky notes or masking tape.
- Put ugly items (cables, tools, cleaning products) inside containers; leave nicer items (books, plants) in view.
Good vertical storage is like a well-designed codebase: the structure is obvious, even if there is a lot happening inside.
Tools, materials, and what to avoid
If you are in student housing, you have to respect rules about drilling and damage. You also probably share walls with other humans who may not enjoy your 2 a.m. drilling session.
Low-damage mounting options
Common options for student-friendly vertical storage:
- Command strips and hooks: Good for light to medium loads, removable without damage if used correctly.
- Over-the-door racks: For doors and sometimes wardrobe frames.
- Tension rods and poles: Work between two surfaces, ideal for closets and some ceilings.
- Freestanding vertical units: Narrow bookshelves, ladder shelves, or pole shelf systems.
Always check weight ratings and surface type. Painted walls, brick, and laminate behave differently.
Things that sound smart but usually fail
Some storage tricks look clever on social media but are miserable in a real student room.
Watch out for:
- Overstuffed hanging organizers: If the fabric sags and blocks access, you will stop using it.
- Too many tiny containers: Ten miniature boxes are harder to manage than one medium box with dividers.
- Complicated modular systems: If you need a manual, you probably will not adjust it later.
- Permanent fixes in temporary rooms: Heavy drilling that will cost you your deposit.
Ask a simple question before buying: “Will I still be using this storage method during finals week when I am tired and stressed?” If the answer feels doubtful, pick something simpler.
Designing your own vertical layout like a small experiment
If you like building or starting things, treat your room like a small design experiment, not a final product.
Plan, test, then commit
Instead of rushing to mount everything:
- Sketch your walls and mark where you want shelves, hooks, and organizers.
- Test layouts with masking tape marks at intended heights.
- Start with temporary options (Command hooks, leaning shelves) before drilling.
You can even prototype with cardboard: cut “fake” shelves and tape them at different heights to see how it feels when you sit or stand.
Your first version of a vertical layout might be wrong. That is not failure; that is feedback.
Build in review moments
After two weeks of using your new setup, ask:
- What still ends up on the floor regularly?
- Which shelf or hook feels awkward to reach every time?
- What storage spots are always half empty?
Then adjust:
- Move daily-use items down to easier reach.
- Shift things you rarely touch to higher places.
- Remove or repurpose any organizer that you ignore.
Over one semester you can evolve a very tailored vertical system that fits your habits, not some generic diagram.
Roommate and shared-space politics of vertical storage
Storage is not just a physical question; it is also social. Hooks and shelves you like might drive your roommate mad if they feel crowded or overshadowed.
Define vertical boundaries
During move-in or the next free evening, have a direct conversation:
- Agree which walls are shared and which are “yours”.
- Decide how much vertical stuff is acceptable visually.
- Discuss noise and timing if drilling is involved.
If you both want vertical storage on the same wall, consider symmetry: matching shelf heights or shared rail systems can look more intentional and less chaotic.
Share vertical systems where it makes sense
Shared vertical storage can actually reduce conflict if done with intention.
Examples:
- A shared hook rack near the door for keys and shared cards.
- A shared shelving unit for cleaning supplies and bulk snacks.
- A shared whiteboard for chores, bills, and schedules.
Just be explicit: label shelves or hooks with names where needed. Ambiguity in shared storage creates quiet resentment very fast.
Vertical storage on a student budget
You probably do not want to spend a week’s food budget on shelves. Fortunately, you do not need to.
Cheap and DIY vertical options
Budget-friendly ideas:
- Crates stacked vertically: Wooden or plastic crates can be stacked and secured with zip ties to form a mini shelf tower.
- Suspended shelves with rope: Simple boards hung from hooks with sturdy cord, for light items.
- Second-hand shelves: Thrift stores and local marketplaces have cheap bookcases that use height well.
- Repurposed shoe organizers: Vertical shoe racks can store tools, snacks, or art supplies.
You can also ask older students or graduating friends; they often give away shelves and organizers rather than move them.
Deciding what to invest in
Some items are worth slightly better quality because you can carry them through multiple moves:
- A solid, narrow bookshelf that fits most standard rooms.
- A sturdy over-the-door organizer with reinforced pockets.
- A well-made pegboard or grid panel with metal hooks.
Cheap items that you can happily treat as temporary:
- Fabric hanging organizers
- Plastic bins and baskets
- Command hooks and strips
Ask yourself: “Will this survive at least two moves and still be useful?” If yes, spending a little more can be rational.
Making vertical storage support your goals, not just your clutter
Storage is not only about hiding stuff. It can actually push you toward the person you want to become.
Put your priorities at eye level
If you want to read more, your books should not be buried in a box. If you care about your startup prototype, it should not live under your bed next to spare sheets.
Try this exercise:
- Pick three areas you want to focus on this semester: maybe “study”, “health”, “building projects”.
- Give each area a visible vertical space: a shelf, a section of pegboard, a corner of the wall.
- Place related objects there: textbooks and planner, gym bag ready to go, tools and prototype parts.
The items you see at eye level every day quietly shape what feels normal to work on.
You can even leave a bit of open space on a visible shelf as a physical reminder that your schedule needs slack too.
Reduce friction on good habits
Vertical storage can make good habits easier:
- Hooks near the door so you never “forget” the gym bag.
- A visible, reachable shelf for healthy snacks instead of piling them on the floor.
- A vertical file holder for active classes so you can grab the right notes fast.
If a habit requires digging into a box under another box, you will always have an excuse not to do it.
When vertical storage is not the answer
There is one uncomfortable point: sometimes you do not need smarter storage; you just need less stuff.
Ask yourself:
- Am I designing systems to store things I never use?
- Would I buy this item again today if I did not already own it?
- Is the mental load of managing this much stuff worth it during exam season?
If the answer is no, vertical storage will not fix the real problem. It will just hide it higher up.
But once you edit your belongings a bit, using vertical space turns a cramped student room into something closer to a mini studio: dense, intentional, and actually workable for studying, building, and living.


